Ghost Blog Note 02
記錄從Github下載後更動過可能會影響到視覺效果的所有內容。


紀錄Casper Theme的更動 (一)
這個Blog使用的主題為Casper (5.7.0),這篇主要是要記錄從Github下載後更動過可能會影響到視覺效果的所有內容。
Collection功能
Collection或是叫Categories也可以,主要目的是用文章的Tag來區分各個主題,不過這裡要注意我的方法是直接列出使用的Tag,接著把它存成collection.hbs放在主題的程式碼中即可:
{{!< default}}
{{!-- The tag above means - insert everything in this file into the {body} of the default.hbs template --}}

<main id="site-main" class="site-main outer">
<div class="inner posts">
    <div class="post-feed">

        {{#get 'tags' limit='all' include='count.posts' order='count.posts desc'}}
            {{#foreach tags}}

                <section class="post-card post-card-large">
                    {{#if feature_image}}
                    <div class="post-card-image-link">
                        {{!-- This is a responsive image, it loads different sizes depending on device
                        https://medium.freecodecamp.org/a-guide-to-responsive-images-with-ready-to-use-templates-c400bd65c433 --}}
                        <img class="post-card-image"
                            srcset="{{img_url feature_image size="s"}} 300w,
                                    {{img_url feature_image size="m"}} 600w,
                                    {{img_url feature_image size="l"}} 1000w,
                                    {{img_url feature_image size="xl"}} 2000w"
                            sizes="(max-width: 1000px) 400px, 800px"
                            src="{{img_url feature_image size="m"}}"
                            alt="{{title}}"
                        />
                    </div>
                    {{/if}}

                    <div class="post-card-content">
                        <div class="post-card-content-link">
                            <header class="post-card-header">
                                    <h2 class="post-card-title">
                                        <a href="{{url}}" style="color: white; white-space: nowrap;">{{name}} </a>
                                    </h2>
                                    <div class="post-card-excerpt">
                                    {{#if description}}
                                        {{description}}
                                    {{else}}
                                        {{!-- A collection of {{count.posts}}  --}}
                                        A collection of {{plural count.posts empty='zero posts' singular='% post' plural='% posts'}}
                                    {{/if}}
                                    </div>
                            </header>
                        </div>
                    </div>
                </section>

                {{#get "posts" filter="tag:{{slug}}" include="tags,authors" order="published_at desc"}}
                    {{#foreach posts}}
                        {{!-- The tag below includes the markup for each post - partials/post-card.hbs --}}
                        {{> "post-card"}}
                    {{/foreach}}
                {{/get}}

            {{/foreach}}
        {{/get}}
    </div>
</div>
</main>建立好collection.hbs也要更改routes.yaml的設定,在Settings > Labs > Routes可以下載目前的設定,更改如下:
routes:
  /collection/: collection

collections:
  /:
    permalink: /{slug}/
    template: index

taxonomies:
  tag: /tag/{slug}/
  author: /author/{slug}/
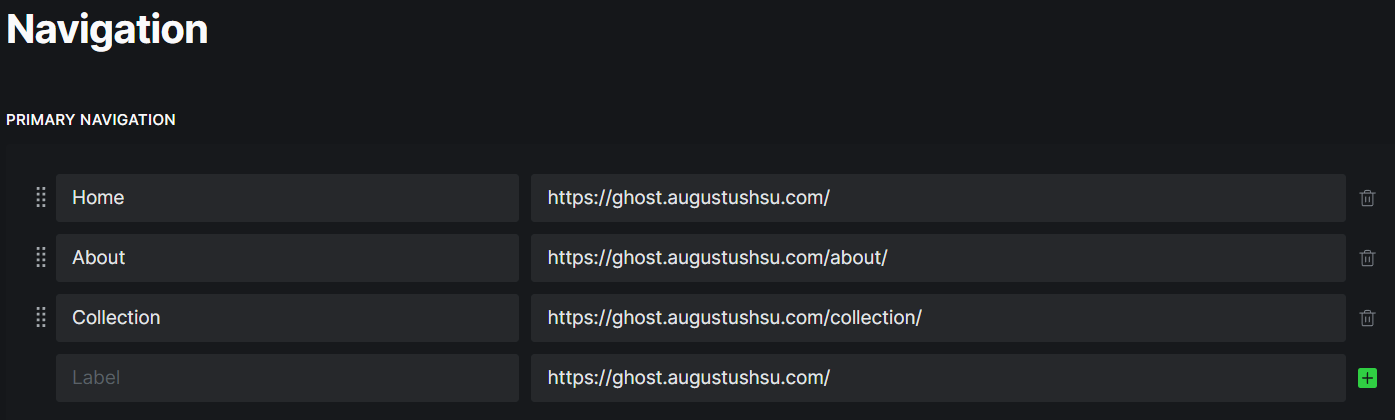
在Settings > Navigation新增Collection頁面對應的網址:
Code Highlight
開啟Settings > Code injection,在Site Header下的方框輸入以下程式碼:
<!-- code block -->
<link rel="stylesheet" href="https://cdnjs.cloudflare.com/ajax/libs/prism/1.28.0/themes/prism-tomorrow.min.css" integrity="sha512-vswe+cgvic/XBoF1OcM/TeJ2FW0OofqAVdCZiEYkd6dwGXthvkSFWOoGGJgS2CW70VK5dQM5Oh+7ne47s74VTg==" crossorigin="anonymous" referrerpolicy="no-referrer" />
一樣在中的Site Footer下面方框輸入以下程式碼:
<!-- code block -->
<script src="https://cdnjs.cloudflare.com/ajax/libs/prism/1.28.0/components/prism-core.min.js" integrity="sha512-9khQRAUBYEJDCDVP2yw3LRUQvjJ0Pjx0EShmaQjcHa6AXiOv6qHQu9lCAIR8O+/D8FtaCoJ2c0Tf9Xo7hYH01Q==" crossorigin="anonymous" referrerpolicy="no-referrer"></script>
<script src="https://cdnjs.cloudflare.com/ajax/libs/prism/1.28.0/plugins/autoloader/prism-autoloader.min.js" integrity="sha512-fTl/qcO1VgvKtOMApX2PdZzkziyr2stM65GYPLGuYMnuMm1z2JLJG6XVU7C/mR+E7xBUqCivykuhlzfqxXBXbg==" crossorigin="anonymous" referrerpolicy="no-referrer"></script>
Table of Contents
在閱讀長文章或是想要查閱文章特定內容的時候,如果有個目錄的話可以幫助你快速想要看到的內容。Tocbot是一個JavaScript的套件,會去掃描網頁的內容自動生成目錄、創建指向那些標題的鏈結、展示它們在頁面上的位置,並根據頁面的標題層次分層組成目錄,這增加了用戶對網頁內容的導航能力。
另外Tocbot允許開發者進行多種自定義設置,包括目錄樣式、深度、位置等,也能夠在不同的設備上提供良好的使用體驗,包括桌面和移動設備。目前的Ghost部落格Casper主題需要修改default.hbs和post.hbs兩個個個文件。
編輯default.hbs
在前面head標籤中{{ghost_head}}添加Tocbot的css樣式,這裡使用的是4.18.2版本,如果後續有需要升級再更改這裡的版本號:
<link rel="stylesheet" href="https://cdnjs.cloudflare.com/ajax/libs/tocbot/4.18.2/tocbot.css">如果直接使用Ghost官方教學的方式會發現生成目錄前面的標號是用英文的abc,所以針對.gh-content ol ol ol li和gh-content ol ol ol li增加了list-style-type: decimal,可以讓生成的標號轉換為數字:
<style>
.gh-content {
    position: relative;
}

/* Start overwrite assets/built/screen.css */
.gh-content ol ol ol li{
    list-style-type: decimal;
}

.gh-content ol ol li{
    list-style-type: decimal;
}
/* End overwrite assets/built/screen.css */

.gh-toc > .toc-list {
    position: relative;
}

.toc-list {
    overflow: hidden;
    list-style: none;
    padding-left: 20px;
}

@media (min-width: 1300px) {
    .gh-sidebar {
        position: absolute;
        top: 0;
        bottom: 0;
        margin-top: 4vmin;
        grid-column: wide-start / main-start; /* Place the TOC to the left of the content */
    }

    .gh-toc {
        position: sticky; /* On larger screens, TOC will stay in the same spot on the page */
        top: 4vmin;
    }
}

.gh-toc .is-active-link::before {
    background-color: var(--ghost-accent-color); /* Defines TOC   accent color based on Accent color set in Ghost Admin */
}
</style>接下來的程序在{{ghost_foot}}添加 Tocbot 的 JS 代碼之前,版本同樣使用 4.18.2:
{{!-- Tocbot script --}}
<script src="https://cdnjs.cloudflare.com/ajax/libs/tocbot/4.18.2/tocbot.min.js"></script>在最近一段時間script之後新增了下一個用於初始化 Tocbot 的方程式,其中.gh-toc和gh-content用於匹配 Casper 的 CSS 類別:
{{! Initialize Tocbot after you load the script }}
<script>
    tocbot.init({
        // Where to render the table of contents.
        tocSelector: '.gh-toc',
        // Where to grab the headings to build the table of contents.
        contentSelector: '.gh-content',
        // Which headings to grab inside of the contentSelector element.
        headingSelector: 'h1, h2, h3, h4',
        // Ensure correct positioning
        hasInnerContainers: true,
    });
</script>
編輯post.hbs
在post.hbs中{{content}}前新增TOC的div標籤:
<section class="gh-content gh-canvas">
    {{! The TOC will be inserted here }}
    <aside class="gh-sidebar"><div class="gh-toc"></div></aside>
    {{content}}
</section>
回到頂部按鈕、顯示閱讀進度
和前面的TOC相同,在default.hbs的{{ghost_head}}前加入以下這段,這個滾動到頂部的按鈕是參考這篇文章,其中有針對使用的主題做一些修改,像是把位置移到右上角、顏色方面改動:
<style>
.scroll-top {
    position: fixed;
    z-index: 50;
    padding: 0;
    right: 60px;
    top: 100px;
    opacity: 0;
    visibility: hidden;
    transform: translateY(15px);
    height: 46px;
    width: 46px;
    cursor: pointer;
    display: flex;
    align-items: center;
    justify-content: center;
    border-radius: 50%;
    transition: all .4s ease;
    border: none;
    color: #ccc;
    background-color: #fff;
}

.scroll-top.is-active {
    opacity: 1;
    visibility: visible;
    transform: translateY(0);
}

.scroll-top .icon-tabler-arrow-up {
    position: absolute;
    stroke-width: 2px;
    stroke: #333;
}

.scroll-top svg path {
    fill: none;
}

.scroll-top svg.progress-circle path {
    stroke: color-mix(in srgb, var(--ghost-accent-color), #000 50%);
    stroke-width: 4;
    transition: all .4s ease;
}

.scroll-top:hover {
    color: red;
}

.scroll-top:hover .progress-circle path, .scroll-top:hover .icon-tabler-arrow-up {
    stroke: var(--ghost-accent-color);
}

/* Dark Mode */
html.dark-mode .scroll-top {
    color: #fff;
    background-color: var(--ghost-accent-color);
}
html.dark-mode .scroll-top .icon-tabler-arrow-up {
    position: absolute;
    stroke-width: 2px;
    stroke: #fff;
}
html.dark-mode .scroll-top svg.progress-circle path {
    stroke: color-mix(in srgb, var(--ghost-accent-color), #fff 50%);
    stroke-width: 4;
    transition: all .4s ease;
}
html.dark-mode .scroll-top:hover .progress-circle path {
    stroke: #fff;
}
html.dark-mode .scroll-top:hover .icon-tabler-arrow-up {
    stroke: #fff;
}
@media (max-width: 991px) {
    .scroll-top {
        right: calc(50% - 23px);
        top: 35px;
    }
}
</style>一樣在default.hbs上,將下面程式碼新增在{{ghost_foot}}前:
<!-- Scroll to Top -->
<script>
    const scrollTopBtn = document.querySelector('.js-scroll-top');
    if (scrollTopBtn) {
        scrollTopBtn.onclick = () => {
            window.scrollTo({top: 0, behavior: 'smooth'});
        }

        const progressPath = document.querySelector('.scroll-top path');
        const pathLength = progressPath.getTotalLength();
        progressPath.style.transition = progressPath.style.WebkitTransition = 'none';
        progressPath.style.strokeDasharray = `${pathLength} ${pathLength}`;
        progressPath.style.strokeDashoffset = pathLength;
        progressPath.getBoundingClientRect();
        progressPath.style.transition = progressPath.style.WebkitTransition = 'stroke-dashoffset 10ms linear';
        const updateProgress = function() {
            const scroll = window.scrollY || window.scrollTopBtn || document.documentElement.scrollTopBtn;

            const docHeight = Math.max(
            document.body.scrollHeight, document.documentElement.scrollHeight,
            document.body.offsetHeight, document.documentElement.offsetHeight,
            document.body.clientHeight, document.documentElement.clientHeight
            );

            const windowHeight = Math.max(document.documentElement.clientHeight, window.innerHeight || 0);

            const height = docHeight - windowHeight;
            var progress = pathLength - (scroll * pathLength / height);
            progressPath.style.strokeDashoffset = progress;
        }

        updateProgress();
        const offset = 100;

        window.addEventListener('scroll', function(event) {
            updateProgress();

            //Scroll back to top
            const scrollPos = window.scrollY || window.scrollTopBtn || document.getElementsByTagName('html')[0].scrollTopBtn;
            scrollPos > offset ? scrollTopBtn.classList.add('is-active') : scrollTopBtn.classList.remove('is-active');

        }, false);
    }
</script>